
It’s vacation time again. So many folks going to the beach, I thought I would share my favorite filter. Using a Circular Polarizer is like adding sunglasses to your camera.
How to Use A Circular Polarizer
- Only use during a bright sunny day. This filter is DARK. It’s supposed to be. So only use it when you need it. Don’t leave it on all the time.
- Compose your shot first. A polarizer refracts light at only certain angles. When you’re looking at your shot, the sun should be to your left or right at a 90 degree angle for the best effect.
- Focus. Hold your DSLR camera up to your eye and focus on your subject. Lock focus by holding the shutter down 1/2 way with your right index finger and don’t move it…
- Now turn the filter in the direction you screwed it on (so it doesn’t fall off). You should see a distinct difference as you turn the filter. When you’re happy with the results, press the shutter the rest of the way to take your shot.
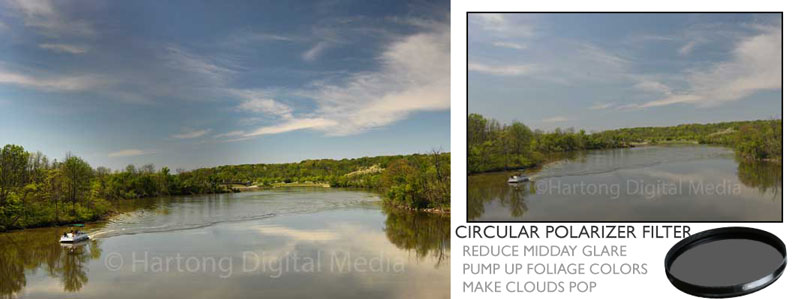
With & Without Circular Polarizer at Winton Lake
Photographing Landscapes: Brighter More Saturated Colors
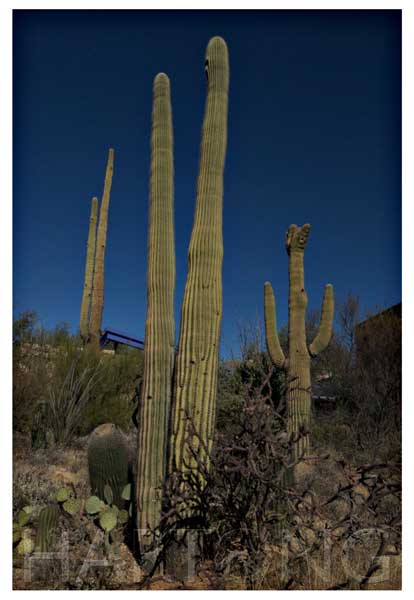
Sapphire Skies in Arizona
If you’re out in the middle of a bright sunny day, add a circular polarizer to get more saturated colors. Water looks amazing when you remove reflections. Beaches look better too as sand is like glass and is reflective. Even Winton Lake pops with deeper greens and blues. Just image what the tropics will look like!
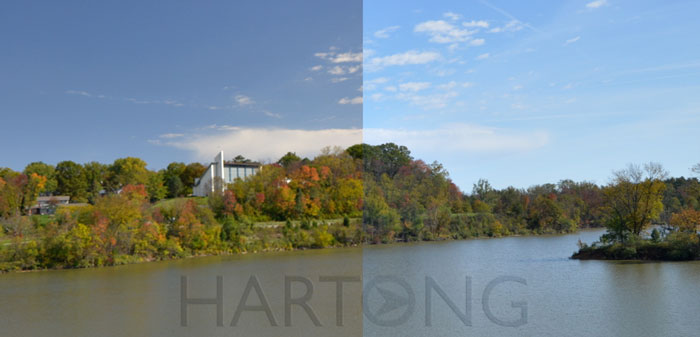
Whiter Clouds & Bluer Sky
For bluer blue sky and whiter puffy clouds use a circular polarizer. Really want to make blue sky pop? Try a polarizer out west in Arizona or New Mexico – be ready – it might knock your socks off!
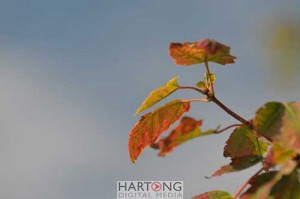
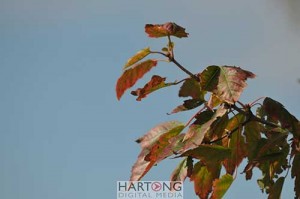
Better Foliage
Have you noticed how some leaves are really glossy? A polarizer will reduce the glare from that glossiness and give you deeper more saturated colors. I use a polarizer for better fall foliage shots all the time.
Polarizers add contrast so having your DSLR set to standard or neutral scenes is much better than vivid – which already increases contrast and saturation. Neutral settings will help you keep detail in the highlights and shadows.
Tip #1: Personally I prefer the best glass I can afford. Tiffen makes a nice filter. B+W – even better coated German glass with metal ring.
Tip #2: Take off your lens cap & look at the number on the back. Canon – typically says 58mm (B+W from Adorama about $86 for pro quality). Nikon – depends on the lens. My suggestion is to get the filter for the largest mm lens you have, then a step-down ring to use the same filter on any smaller lenses… For instance, if you have 72mm large lens, get a 72mm filter, and a ring to go from 72 to say 52mm for the smaller lens… Adorama 52mm Tiffen Filter is under $20 at the time of posting – absolutely fine for “non-pros”.
With polarizer: saturated colors, less glare on leaves
glare on leaves without polarizer
Want to learn more? Join me for a private photography lesson or a family photo safari at a local park. You’ll be amazed with at the difference my polarizer filter can make in person! See for yourself. Private lessons start at 2 hours for just $125.